
Small water leaks are easy to ignore. A few drops beneath a sink, a faint stain on a ceiling, or a damp patch behind a toilet may not look serious at first. The problem is that water can continue moving through cabinets, flooring, walls, and ceilings long after the visible signs appear.
Finding a leak early can prevent a minor plumbing problem from becoming expensive water damage. You do not need specialized equipment to perform a useful inspection. A flashlight, some paper towels, and a few minutes of careful checking can reveal problems that are otherwise easy to miss.
This guide explains where to look for small household water leaks, how to check common plumbing areas, how to use your water meter to investigate unexplained water use, and when a leak requires professional attention.
What Counts as a Small Water Leak?
A small leak may be anything from a slow drip to a barely noticeable amount of water escaping from a pipe connection, valve, toilet, appliance, or plumbing fixture.
Some leaks are obvious. You may see water collecting under a sink or hear a faucet dripping.
Others are much harder to spot. A leaking toilet may allow water to pass silently into the bowl. A loose pipe connection inside a cabinet may only produce a few drops after someone uses the sink. A concealed pipe leak can leave a stain or cause paint to bubble before enough water appears to form a puddle.
The amount of visible water is not always a good indication of how serious the problem is.
Pay attention to changes rather than looking only for standing water. A new musty smell, unexplained dampness, swollen cabinet material, peeling paint, or an unexpected increase in water use can all justify further inspection.
Can You Check for Leaks Yourself?
Yes. A basic home leak inspection is generally a reasonable task for most homeowners and renters.
You can inspect accessible plumbing connections, faucets, toilets, appliance supply lines, exposed pipes, and areas around fixtures without taking plumbing apart.
The important distinction is between checking for a leak and repairing a plumbing system.
You can safely look for visible signs, dry suspicious areas, monitor them, and check your water meter. However, you should not disconnect pressurized plumbing, open walls, or attempt complicated pipe repairs if you do not understand the system.
A basic inspection can take around 20 to 45 minutes, depending on the size of the home and how many plumbing fixtures it contains.
Tools and Materials You May Need
You only need a few simple items for most inspections.
A flashlight is useful for looking behind toilets, beneath cabinets, around appliances, and in dark corners.
Paper towels or a dry cloth can help detect very small amounts of moisture. Wipe around a fitting and check whether the towel becomes damp.
A bucket or shallow container can be useful underneath an exposed pipe connection where a slow drip is suspected.
A notebook or phone can help you record unusual findings and monitor whether a damp area becomes larger over time.
You may also use a water meter, if your property has an accessible meter, to investigate unexplained water movement when no fixtures are being used.
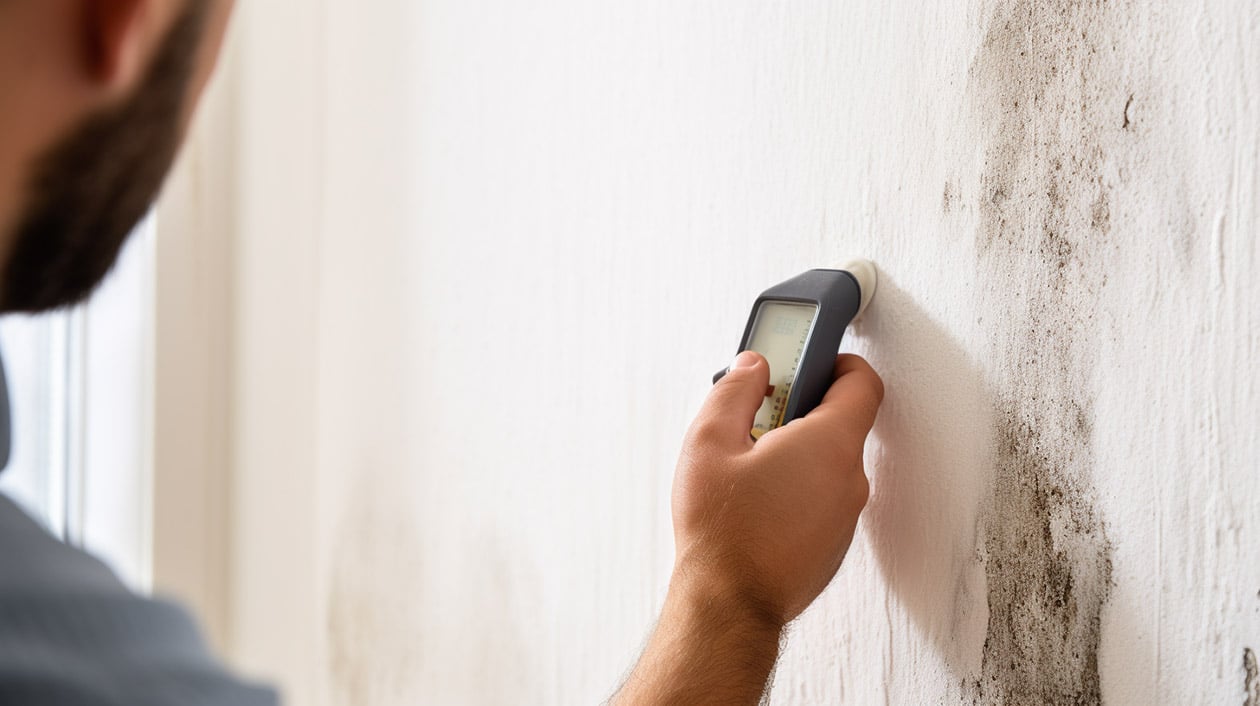
You do not need to buy a moisture meter for a basic inspection, although one can sometimes help investigate suspected moisture behind or beneath surfaces.
Before You Start
Start with a quick visual inspection rather than immediately touching plumbing connections.
Look around kitchens, bathrooms, laundry areas, utility spaces, and any location where water enters or leaves the home.
Check for:
- Damp or discolored surfaces
- Water stains
- Peeling or bubbling paint
- Swollen wood
- Musty odors
- Mold-like spotting
- Corroded plumbing connections
- Drips or drops
- Unexplained puddles
- Flooring that feels unusually soft or swollen
If you discover standing water close to electrical outlets, appliances, or electrical equipment, do not handle the wet equipment. Keep clear of the area and arrange appropriate professional help.
If you rent your home, document visible water damage with photographs and notify the landlord or property manager according to your rental agreement.
Step-by-Step: How to Check Your Home for Small Water Leaks
Step 1: Start Under Every Sink
Kitchen and bathroom cabinets are among the easiest places to miss a small plumbing leak.
Remove items from underneath the sink so you can see the entire cabinet floor and the plumbing connections.
Use a flashlight to inspect the supply lines, shutoff valves, drain connections, and the area where the drain pipe leaves the cabinet.
Look for water marks, corrosion, mineral deposits, swollen particleboard, or a damp cabinet floor.
Then run a dry paper towel around accessible connections. If the towel becomes wet, identify exactly where the moisture is coming from.
Do not immediately tighten every connection you see. Some plumbing fittings require specific methods, and overtightening can damage them.
Step 2: Check Faucets and Faucet Bases
Look around the base of kitchen and bathroom faucets.
A faucet can leak from the spout, handle, or connections underneath the sink. Water can also collect around the base and gradually damage the surrounding countertop or cabinet.
Turn the faucet on briefly and observe the connections underneath while water is running.
After turning it off, wipe the area completely dry. Check again after several minutes.
If water reappears after the area was thoroughly dried, you have a useful clue that the fixture or its connections need attention.
Step 3: Inspect Toilets Carefully
Toilets deserve special attention because not every toilet leak produces a puddle.
First inspect the floor around the base. Look for discoloration, dampness, damaged flooring, or a persistent musty smell.
Check the water supply connection behind or beside the toilet for visible moisture.
Then listen when the toilet has not been used for several minutes. A toilet that periodically refills without being flushed may be losing water through the tank or flush mechanism.
You can also place a few drops of food coloring in the toilet tank and wait without flushing. If colored water appears in the bowl, water is passing from the tank into the bowl. This test can help identify an internal toilet leak.
Clean the bowl first if necessary so you can clearly see the result.
Step 4: Examine Shower and Tub Areas
Water does not always leak through a pipe when a bathroom shows moisture damage.
Check the showerhead connection, faucet area, tub edges, and visible caulk or sealant.
Look for cracked or separated caulk, damaged grout, loose trim, or staining around the shower.
If the wall or floor outside the shower becomes damp after someone takes a shower, do not assume the plumbing inside the wall is necessarily leaking. Water can escape through damaged seals or joints and travel underneath flooring or behind wall surfaces.
A persistent damp area outside a shower deserves investigation because repeated moisture exposure can damage building materials.
Step 5: Look Behind and Around the Toilet and Bathroom Fixtures
Use a flashlight to inspect areas that are difficult to see during normal cleaning.
Check around the toilet supply line, shutoff valve, sink plumbing, and visible pipe connections.
Run a dry cloth around accessible areas.
Pay particular attention to signs that have been there for some time. White or greenish deposits around metal connections, rusty areas, swollen wood, or repeated staining can indicate moisture exposure even when the area is currently dry.
Do not confuse old staining with an active leak. Dry the area, monitor it, and see whether fresh moisture appears.
Step 6: Inspect the Washing Machine Connections
Washing machines use pressurized water supply hoses, so their connections deserve regular attention.
Check both ends of the hot and cold supply hoses if your machine uses separate connections. Inspect the hose surfaces for cracking, bulging, corrosion, or signs of wear.
Look behind the machine for damp flooring or staining.
Do not pull a heavy appliance away from the wall by yourself if doing so could cause injury or damage the connections. If access is difficult, use a flashlight from the side or arrange appropriate assistance.
Step 7: Check the Dishwasher and Refrigerator Water Line
If your dishwasher has a water supply connection, inspect the accessible plumbing beneath the sink or around the appliance.
Also check behind or underneath a refrigerator that has an ice maker or water dispenser.
A small supply-line leak may not create a large puddle immediately. Water can travel underneath an appliance or into flooring where it is difficult to see.
Look for damp flooring, swelling, staining, or mineral deposits around accessible connections.
Do not move a large appliance if doing so could damage the water line or create a safety risk.
Step 8: Inspect Exposed Pipes and Utility Areas
If your home has exposed plumbing in a basement, utility room, garage, or other accessible area, inspect the pipes and connections carefully.
Look for droplets, corrosion, staining, and moisture around joints.
A small leak may leave a trail rather than forming a visible puddle directly underneath the source. Water can travel along the outside of a pipe before dripping from another point.
If you find a suspicious area, dry it thoroughly and check again after the plumbing has been used.
This simple test can help distinguish an old water mark from an active leak.
Step 9: Check Ceilings and Walls for Water Stains
Walk through rooms located below bathrooms, kitchens, laundry areas, or other plumbing.
Look at ceilings and walls for new discoloration, bubbling paint, peeling surfaces, or soft spots.
A water stain does not automatically tell you where the leak is located. Water can travel horizontally inside a ceiling or wall before appearing somewhere else.
For that reason, do not simply paint over a stain.
If the stain is new, growing, damp, or accompanied by dripping water, investigate the source before repairing the surface.
Step 10: Check the Water Meter for Unexplained Water Use
Your water meter can provide another useful clue.
First make sure all faucets, showers, toilets, washing machines, dishwashers, and other water-using fixtures are turned off. Do not run water during the test.
Check the meter and note its reading or observe the indicator designed to show water movement, if your meter has one.
Wait for a period while no water is being used and check again.
If the meter continues showing water use when everything is shut off, there may be a leak somewhere in the plumbing system.
This test is not a perfect diagnostic tool. Some systems or appliances can behave differently, and a very small leak may be difficult to detect immediately. But unexplained water movement is a good reason to investigate further.
If your property has a shutoff valve that allows you to isolate sections of the plumbing safely, a qualified professional can use that information to narrow down the source.
What If You Find a Small Leak?
The correct response depends on where the leak is and whether you can safely control it.
If water is dripping from an accessible fixture or connection, identify the source and, where appropriate, close the local shutoff valve.
Place a container underneath the leak to limit immediate water damage while arranging a repair.
If the leak is coming from a toilet, sink supply, appliance connection, or another fixture with an accessible shutoff valve, shutting off that individual supply may limit disruption to the rest of the home.
If you cannot stop the leak locally or water is spreading rapidly, you may need to shut off the home’s main water supply.
Do not open walls or ceilings simply because you suspect a concealed leak. If you see evidence of water inside a wall or ceiling, professional assessment may be appropriate.
What If You Cannot Find the Source?
Sometimes the visible water is not located directly below the leak.
Water follows gravity and can travel along framing, pipes, flooring, and other surfaces before appearing somewhere else.
Start by looking above and around the visible stain rather than focusing only on the wettest point.
Think about when the moisture appears. Does it happen after someone showers? After the washing machine runs? When it rains? When a particular sink is used?
The timing can provide valuable information.
If a ceiling stain appears only after heavy rain, the problem may be related to the roof or exterior rather than indoor plumbing. If it appears shortly after someone uses the bathroom above, plumbing or shower-related moisture becomes more likely.
When the source remains unclear, avoid repeatedly disturbing walls or ceilings. Document what you see and consider having the area assessed.
Common Mistakes to Avoid
Painting Over a Water Stain
Fresh paint can hide the appearance temporarily, but it does not stop water. Find and address the source first.
Assuming a Dry Area Is Problem-Free
A leak may be intermittent. A fitting can leak only when water is flowing or when a drain is being used.
Tightening Every Fitting
Overtightening plumbing connections can damage components or create new problems. Identify the actual source before attempting a repair.
Ignoring Small Drips
A slow leak can damage cabinets, flooring, drywall, or other materials over time. The fact that the amount of water is small does not mean the problem should be ignored.
Moving Heavy Appliances Carelessly
Washing machines, refrigerators, and other appliances can be heavy and difficult to move safely. Avoid pulling them forward if doing so could injure you or damage a water line.
Assuming the Lowest Wet Spot Is the Source
Water can travel before it becomes visible. The location of a stain may not be the location of the original leak.
When You Should Call a Professional
A professional plumber or other qualified contractor is appropriate when the source is concealed, difficult to access, or beyond a simple fixture-level issue.
Call for professional help if you find a leak inside a wall or ceiling, a damaged pipe that requires replacement, rapidly spreading water, or significant water damage.
You should also seek help if you suspect a leak near electrical equipment or if you cannot safely shut off the water.
If the water damage has been present for an extended period, additional assessment may be needed for damaged building materials or microbial growth.
A professional is also a sensible choice when a repair requires cutting into walls, working on inaccessible plumbing, or replacing components you cannot identify confidently.
If you are unsure whether a suspected problem involves plumbing, roofing, drainage, or another building system, professional diagnosis can prevent you from repairing the wrong thing.
How to Prevent Small Water Leaks From Becoming Big Problems
Make leak checks part of your normal home maintenance rather than waiting until you notice water damage.
Every few months, look underneath sinks and around toilets, washing machines, dishwashers, and other water-using appliances.
Keep cabinets underneath sinks relatively uncluttered. When the space is packed with cleaning supplies and other items, small leaks can remain hidden.
Know where the main water shutoff valve is located before an emergency occurs. Everyone in the household who may need to respond to a leak should know how to access it.
Pay attention to changes in your water bill or unexplained water consumption. A sudden increase can sometimes indicate a leak, although water use naturally changes with household habits.
Keep an eye on caulk and seals around wet areas. Replace deteriorated sealant when appropriate rather than waiting for water to reach surrounding materials.
Finally, do not ignore small changes. A faint stain, occasional drip, or damp cabinet floor is easier to investigate today than a damaged wall or floor several months later.
Final Check
After completing the inspection, make a note of anything that needs monitoring or repair.
Accessible plumbing should be dry, cabinets should show no unexplained fresh moisture, toilets should not continuously refill without use, and appliance connections should not show active dripping.
Check suspicious areas again after the plumbing has been used.
If you performed a water-meter test and noticed unexplained water movement, continue investigating rather than assuming the reading is harmless.
Most importantly, separate old evidence of a leak from an active leak. A dry stain may be from a previous problem, while fresh moisture that repeatedly returns deserves attention.
Frequently Asked Questions
How often should I check my home for water leaks?
A quick visual inspection every few months is a sensible habit, with extra checks around appliances and plumbing connections when you notice a change in moisture, water use, or the condition of surrounding materials.
What is the easiest way to find a small water leak?
Start with accessible plumbing. Check under sinks, around toilets, faucets, appliances, and exposed pipes using a flashlight and dry paper towel. If nothing obvious appears, monitoring the water meter when no water is being used can provide another clue.
Can a small water leak cause serious damage?
Yes. Even a slow leak can damage drywall, cabinets, flooring, insulation, and other materials if it continues unnoticed. The extent of damage depends on the location, duration, and amount of water involved.
Why is my water meter moving when everything is turned off?
Continuous movement may indicate water is being used somewhere or that there is a leak. Check toilets, fixtures, appliances, and other possible sources first. If unexplained movement continues, further investigation may be necessary.
How can I tell if a water stain is from an old leak?
An old stain is usually dry and does not grow or become damp again. However, appearance alone cannot always prove that a leak has stopped. Dry the area, monitor it, and investigate any new moisture or expansion.
Can a water leak be hidden inside a wall?
Yes. Plumbing can leak inside walls or ceilings, and water may travel before becoming visible. Signs can include unexplained staining, bubbling paint, dampness, musty odors, or changes in nearby materials.
Should I fix a water leak myself?
Minor fixture-level problems may be suitable for DIY repair if you understand the component and can safely control the water supply. Concealed leaks, significant water damage, pressurized plumbing problems, and situations involving electrical hazards are better handled by qualified professionals.
Final Thoughts
Checking for small water leaks does not require expensive equipment or advanced plumbing skills. The most useful approach is simply to inspect the places where water enters, leaves, or passes through your home and pay attention to changes.
Look underneath sinks, around toilets and faucets, behind accessible appliances, along exposed pipes, and on ceilings or walls below plumbing. Use a dry cloth or paper towel when visual inspection is not enough, and consider a water-meter check when you cannot explain ongoing water use.
If you find active water, control it safely and investigate the source. If the problem is concealed, extensive, or connected to electrical or structural concerns, stop and get appropriate professional help.
Small leaks are much easier to deal with when they are still small.